Over the last few months, I have been re-examining my approach to improving someone’s squat. In these case scenarios, I tend to use myself as a guinea pig. I can dedicate a substantial portion of my training exclusively to addressing the issue and I can experience how it feels. There are approaches, treatments, and protocols that have an element of discomfort attached. An example may be the heart rate intensity required to truly follow the Tabata protocol (can you say “lung burn”) or the level of pain when applying pressure to an irritable muscle spindle or muscle knot with a ball or massage gun. My experiment was to help re-establish knee stability. It’s been 13 months since my knee surgery. Knee arthroscopy is a common knee procedure, and I chose this opportunity to document my personal journey, so I can be a resource for others in the future.
An accepted theory for movement is that the body is a stack of mobile and stable joints. This was popularized by physical therapist, Gray Cook, twenty years ago. Each joint has specific training needs and has predictable levels of dysfunction.
- Ankle- Mobile
- Knee- Stable
- Hip- Mobile
- Lumbar spine- Stable
- Thoracic spine- Mobile
- Gleno-humeral- Stable
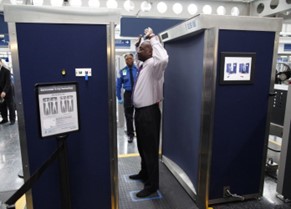
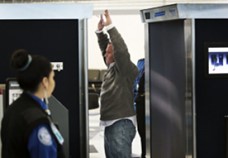
What I’ve recently come to understand is that a joint may need both mobility and strength. Let’s consider the shoulder (gleno-humeral joint). To keep it simple, it’s a ball and socket joint. You want to have the ability to lift the arm overhead without having to elevate or shrug your shoulders. I traveled this past week and was amazed how many people struggle to do this. Just think about the security scanner at the airport.


This joint depends on mobility of the joint below it, the scapula-thoracic joint. These two are dependent on one another. I like the analogy strength coach, Mike Boyle, uses. “You can’t shoot a cannon from a canoe”. The upper back frequently gets compromised and gets stiff. This then leads to compensation of the joint above it.
When I started to address the stability and strength of my knee, I had to first improve my internal hip mobility. This required two steps. First, from years of walking on a compromised knee, my hips had gradually gotten tighter and more restrictive. This is a common compensation. I had to address the tissue quality which required deep tissue work with foam rollers and balls to improve the tissue quality.
Here’s a quick video demonstrating trigger point work on my glutes.
https://www.instagram.com/p/Bu-UAROFORI/?utm_source=ig_web_copy_link
The next step was to then apply hip mobility drills. This included exercises such as hip circles or, as they are referred to by Dr. Andreo Spina, controlled articular rotations (CARs) or 90/90 drills performed on the ground using Mobility Sticks.
The next step is important, but commonly missed. Anytime you add an activity to increase mobility, follow it up with a motor control or stability technique. I use x-walks with a super band for this. Below is a link to a video demonstrating.
https://www.instagram.com/p/B8XSjgwHxe5/?utm_source=ig_web_copy_link
After that, you can “lock” it in by performing a functional pattern. In this example, the functional pattern is the kettlebell goblet squat. To review, the steps are:
1. Tissue work on the glutes
2. Mobility drill for the hips (emphasis on internal rotation)
3. Stability drill for the hips
4. Kettlebell goblet
It may appear to be a lot of steps, but coming back from an injury is never simple. What you must consider is that it’s not going to be a particular exercise that produces results, but rather a sequence of drills. When trying to anticipate the length of time for recovery remember to factor in the duration of the joint or movement dysfunction. This will require patience, but remember like many things, it’s a process. I’ll see you at the studio.
